Measuring your floor is easier than you think. Follow the simple steps below for each part of your home. Don't worry about being perfect — we always come and check the measurements before we fit anything.
What you need
A metal tape measure (a long one, 5 m or more, is best).
A pen and paper, or the notes app on a phone.
A grown-up or friend to hold the other end of the tape.
Golden rules
Measure in metres and centimetres (for example 3.45 m). If you only have feet and inches, that's fine — just tell us which you used.
Measure every wall twice. Walls are not always straight, so use the bigger number.
Measure from wall to wall, right up to the skirting boards.
Add about 10% extra for cutting and fitting. Our team can do this bit for you.
Step-by-step 1
Square or rectangle rooms
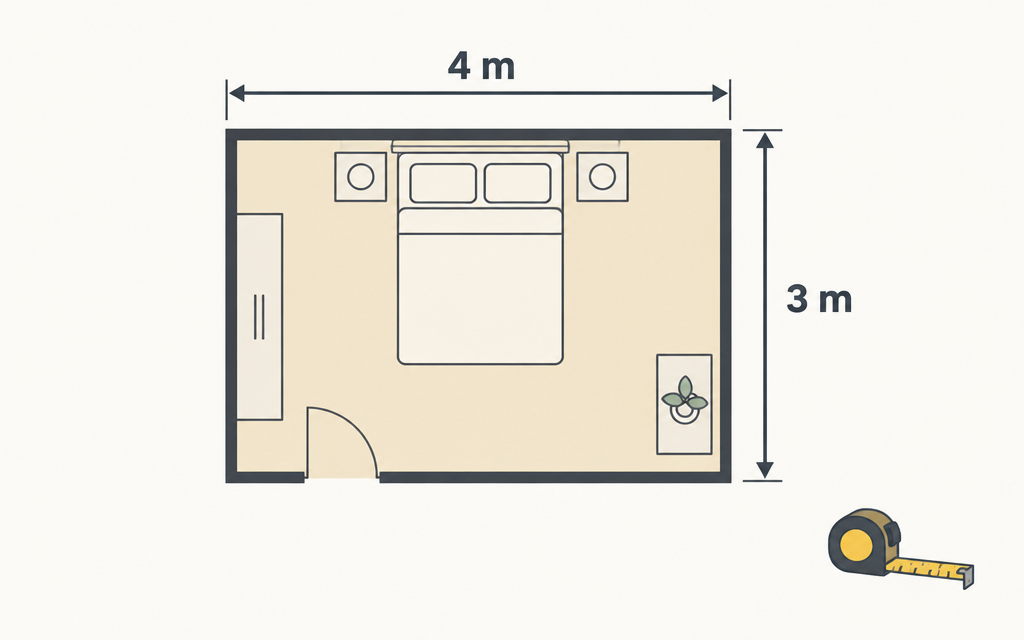
Most bedrooms and living rooms are a simple box shape. This is the easiest one!
1Measure how long the room is, from one wall to the opposite wall. Write it down.
2Now measure how wide the room is, from one side wall to the other. Write that down too.
3Measure right into the doorway, up to the middle of where the door closes, so the floor reaches under the door.
4Times the length by the width. That gives you the area in square metres (m²).
Example: Room is 4 m long and 3 m wide → 4 × 3 = 12 m².
Step-by-step 2
Hallways and landings
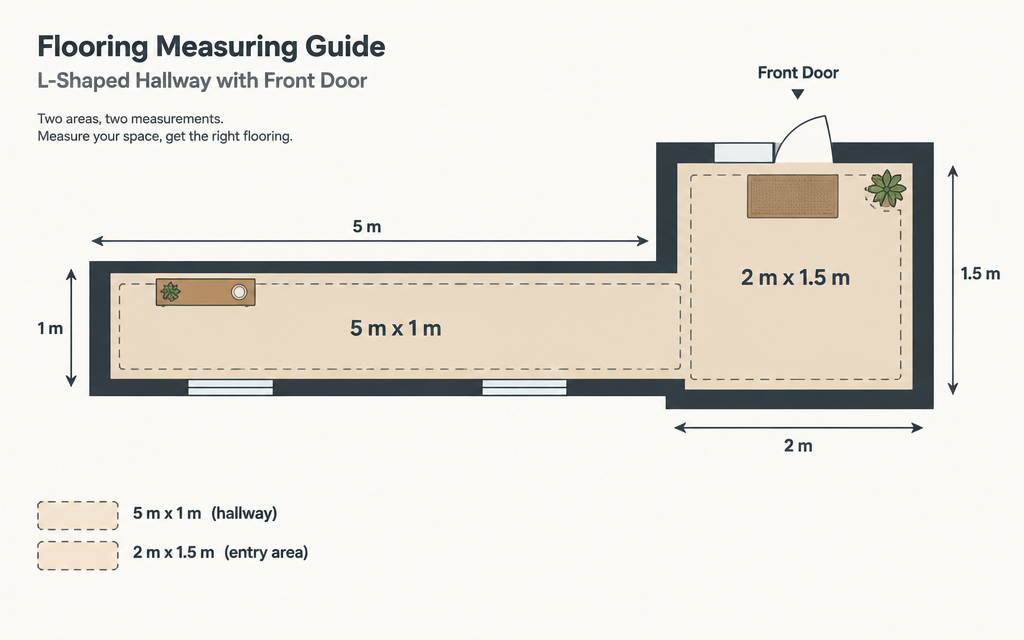
Hallways are long and thin, and often have doors and corners. Split them into simple boxes.
1Imagine cutting the hallway into rectangles — for example the long bit, and the wider bit by the front door.
2Measure the length and width of each rectangle and write them down separately.
3Don't forget to measure into each doorway that opens off the hall.
4Work out each rectangle (length × width), then add them all together.
Example: Long bit 5 m × 1 m = 5 m². Front door bit 2 m × 1.5 m = 3 m². Total = 8 m².
Top tip: Draw a quick bird's-eye sketch of the hall and write each measurement on it — it really helps us.
Step-by-step 3
Staircases
Stairs look tricky but they are just lots of small steps that are the same.
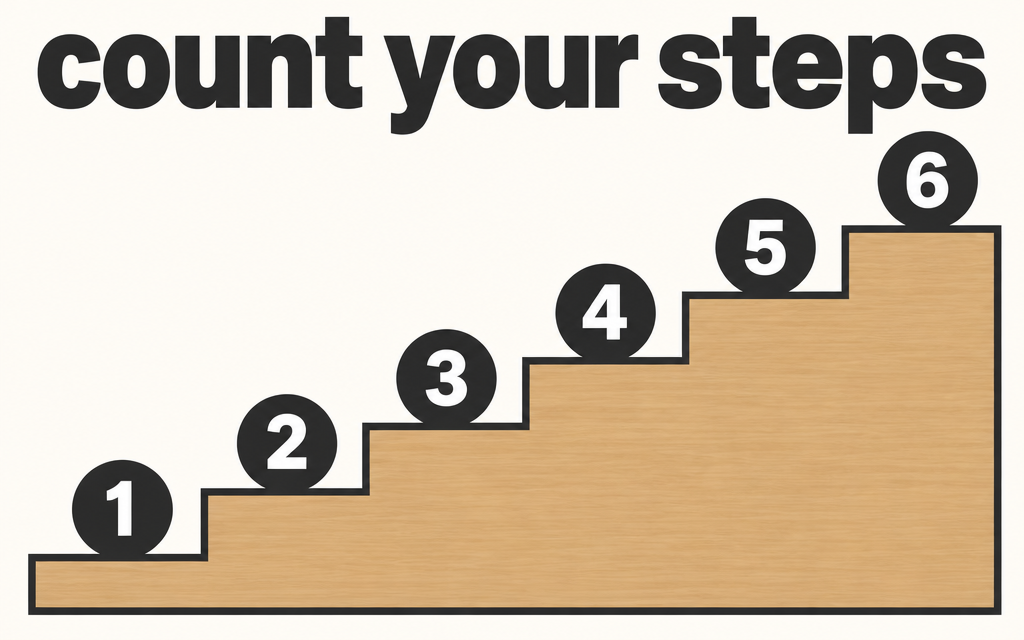
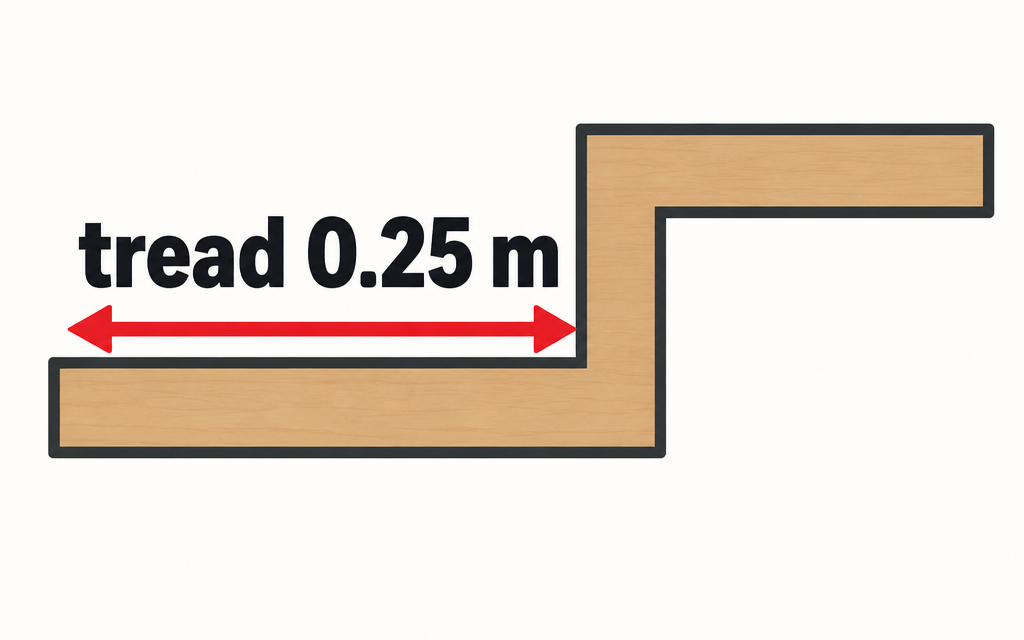
1Count how many steps you have. Each flat bit you stand on is called a tread.
2Measure one tread from the back to the front edge (the depth).
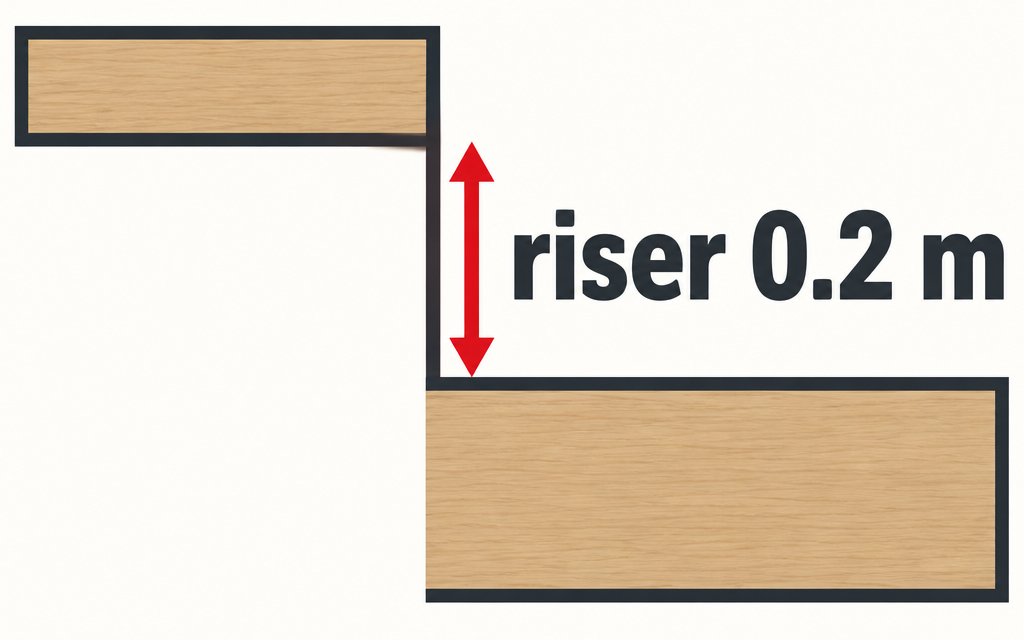
3Measure the riser — that's the upright bit at the front of each step, from the bottom to the top.
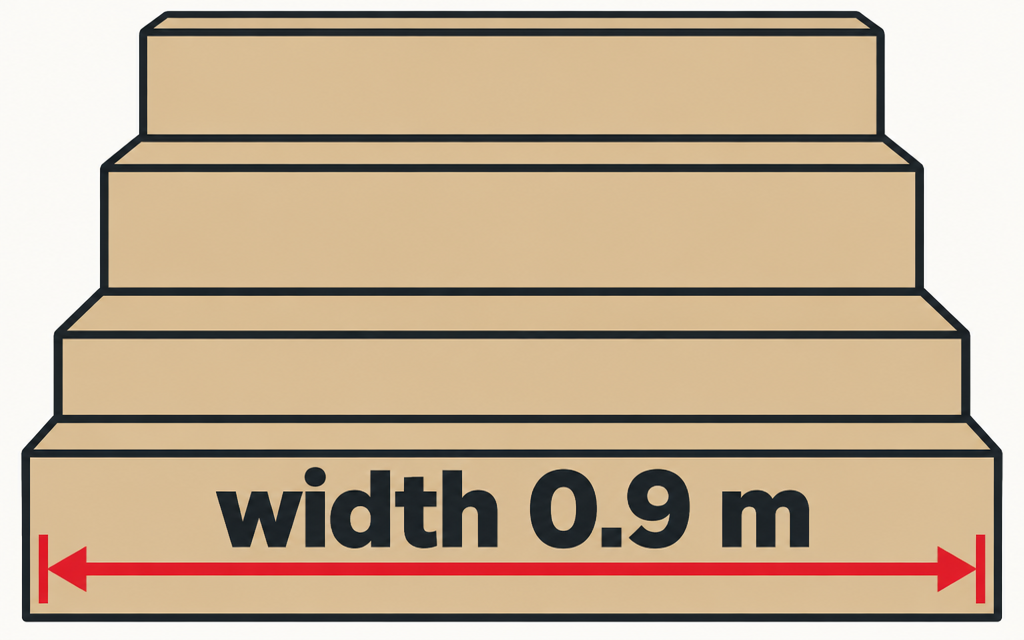
4Measure how wide the stairs are, from one side to the other.
5If you have curved or turning steps at a corner (called winders), tell us how many — they need extra carpet.
6Landings at the top or halfway? Measure those like a small room.
1Count how many steps you have.2Measure the flat part you stand on — that's the tread.3Measure the upright part — that's the riser.4Measure across the stairs, from one side to the other.
Example: 13 straight stairs, 0.9 m wide. Each tread 0.25 m and riser 0.2 m → send us those numbers and we'll work out the rest.
Top tip: Doing a stair runner? Measure how wide you'd like the runner, not the whole step.
Step-by-step 4
L-shaped and odd-shaped rooms
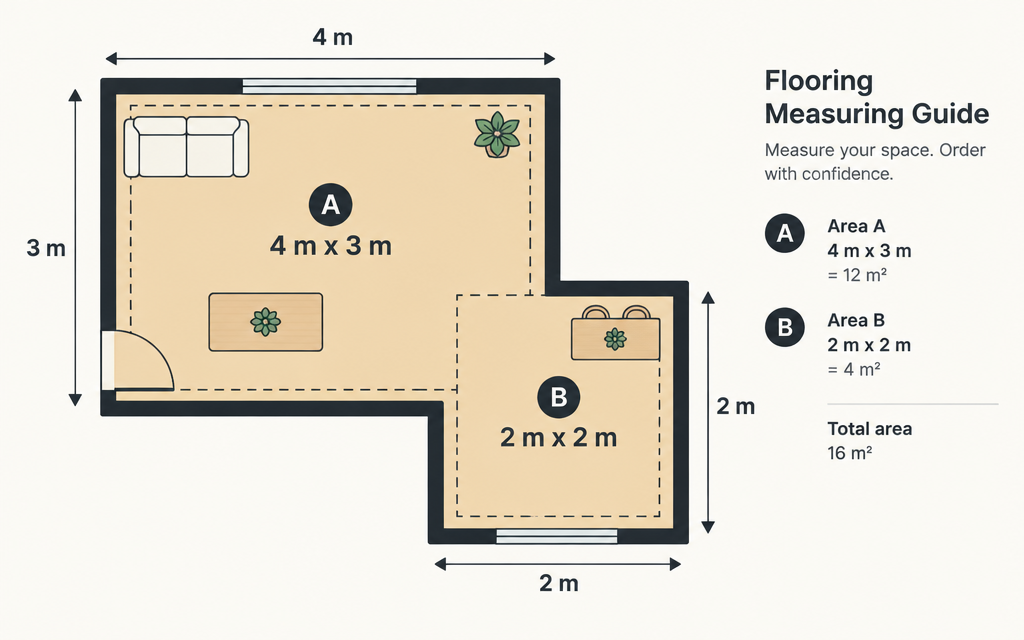
If your room looks like the letter L, or has a cut-out bit, split it into boxes.
1Draw the room shape on paper, then draw lines to split it into two or more rectangles.
2Measure the length and width of each rectangle.
3Work out each one (length × width) and add them together.
Example: Box A 4 m × 3 m = 12 m². Box B 2 m × 2 m = 4 m². Total = 16 m².
Step-by-step 5
Bay windows, alcoves and chimney breasts
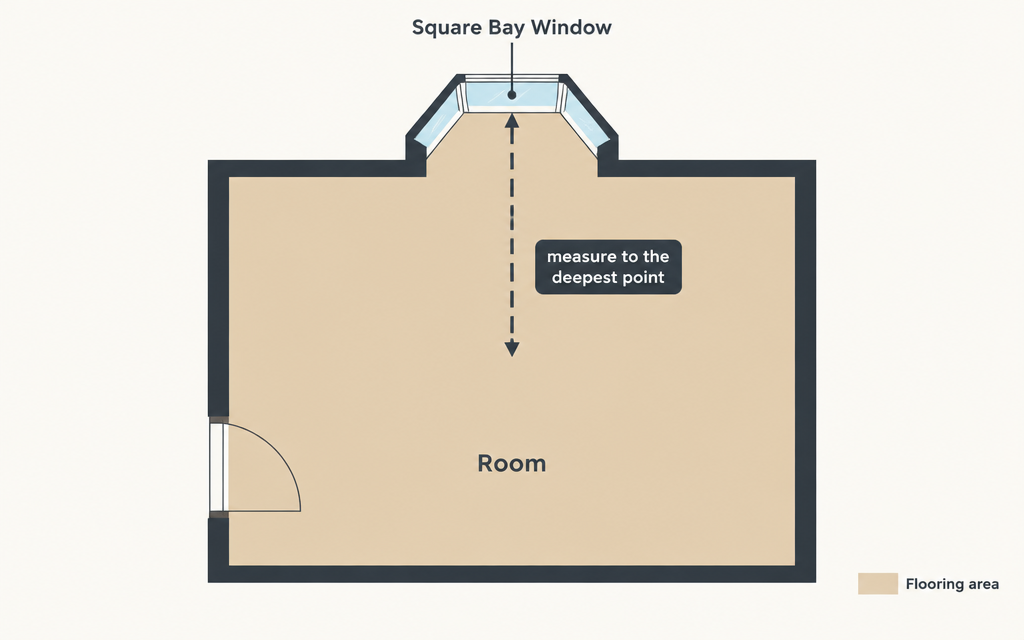
Bits that stick in or out still need flooring, so always measure to the furthest point.
1Bay window: measure from the back wall right into the deepest point of the bay.
2Alcoves (the gaps either side of a chimney): measure the room to the back of the alcove.
3Chimney breast that sticks out? Still measure wall to wall — it is better to have a little extra.
Top tip: Always measure to the widest and longest points. Too much is fine, too little is a problem!
Step-by-step 6
Kitchens and bathrooms
These rooms have cupboards, toilets and baths in the way.
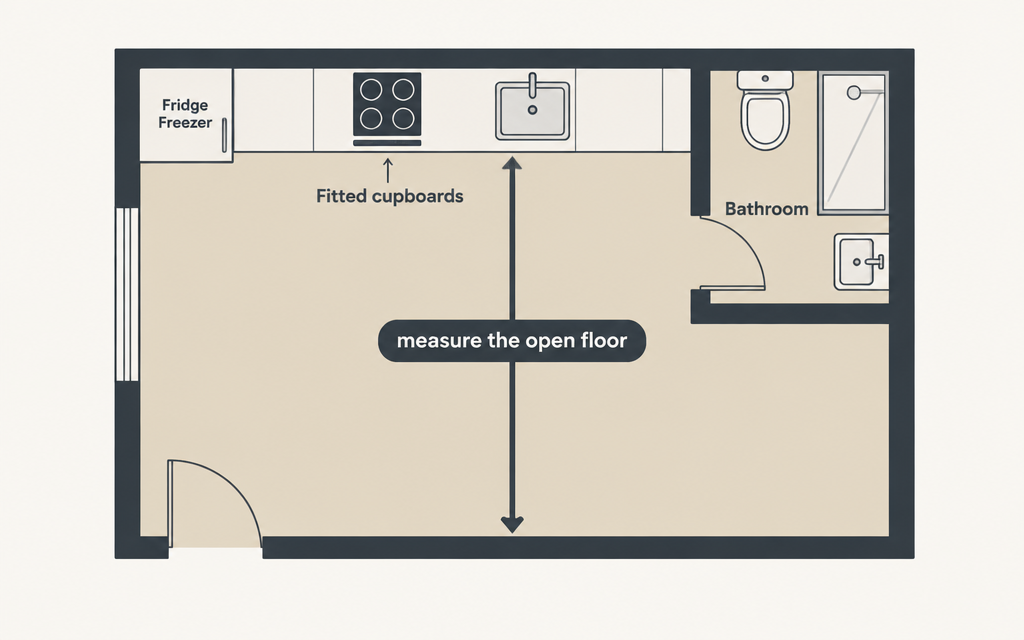
1Measure the open floor you can see, from the front of the cupboards to the opposite wall.
2Tell us if you want flooring to go under the units or just up to them.
3Don't worry about measuring around the toilet or sink — we'll cut around those on the day.
Stuck? We'll measure for you
Send us your rough measurements for a quote, and we'll always do a proper measure before fitting.